Assignment: Inspiring Vision
“Photograph wildlife with the aim of inspiring others to share your love of living creatures in the wild. Use every trick in the book to provide an insight into behavior and to create the most stunning image you can: amazing lighting, dynamic colors, and careful framing.”
— from Digital Photography Masterclass by Tom Ang
Results
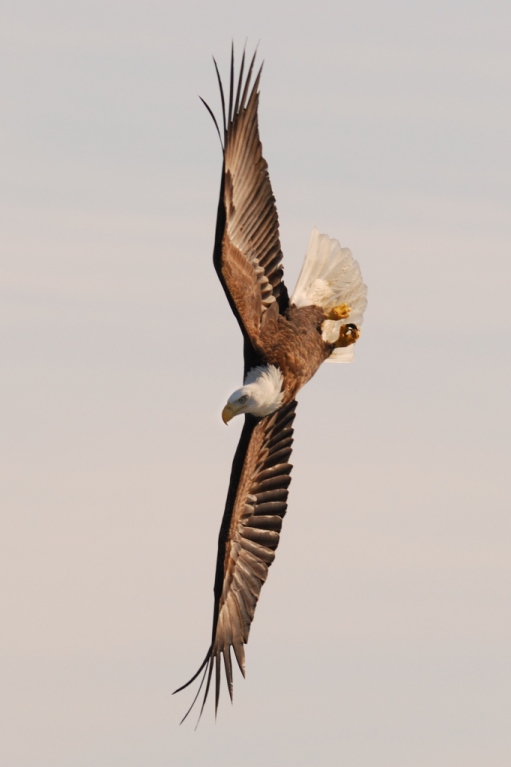
Free, American Bald Eagle in Flight
As a Chicago-based fine art landscape and architectural photographer, I’m used to photographing things that stand still, or at most move no more quickly than the sun or the clouds. I’m accustomed to having time to think, to visualize the composition, to move around and look for the best light and shadow to realize an image.
So an outing on a cold February Saturday to Lock and Dam No. 14 on the west bank of the Mississippi River near Le Claire, Iowa to photograph eagles in flight was very different from my usual routine. But hey, shouldn’t everyone have a few eagles in their portfolio?
There was even a guy with a fish slingshot made of 1/2 inch iron pipe and bungee cords to fling bait out in the river to attract the eagles.
My daughter Helena came along on the trip, and she aimed our huge rented 300mm auto-focus lens to track the soaring birds as proficiently as Tom Cruise in the movie Top Gun lining up a Russian fighter jet.
As they say in the Visa commercials …
- Tank of gas for round trip Naperville, IL to Le Claire, IA: $25.00
- Weekend Rental fee for 300 mm Nikkor Auto-Focus Lens: $60.00
- Time with my precious daughter Helena: Priceless
Tips for Photographing Birds in Flight
- Shoot RAW format if possible
- Set to MATRIX EXPOSURE METERING
- Set to SHUTTER PRIORITY mode, 1/1000th is ideal for flying birds
- Set to CONTINUOUS AUTO FOCUS
- Set to AUTO FOCUS AREA / MULTI POINT FOCUS TRACKING
- Set to CONTINUOUS SHUTTER RELEASE MODE
- Adjust EXPOSURE COMPENSATION as needed after viewing LCD Histogram
Once your camera is set up correctly, it’s your physical shooting technique that makes the great shots. Channel Tom Cruise!